After confirming all line items on a PO, the next 4
steps are to confirm carton marks, select payment terms, confirm the order, and
view the report.
Step 1 of 4:
Confirm Carton Marks
After confirming all line items, user is navigated to a page where the carton
mark instructions, can be reviewed, the carton icons may be downloaded, and
vendor can confirm that the cartons will be marked as instructed (detailed
instructions below image):
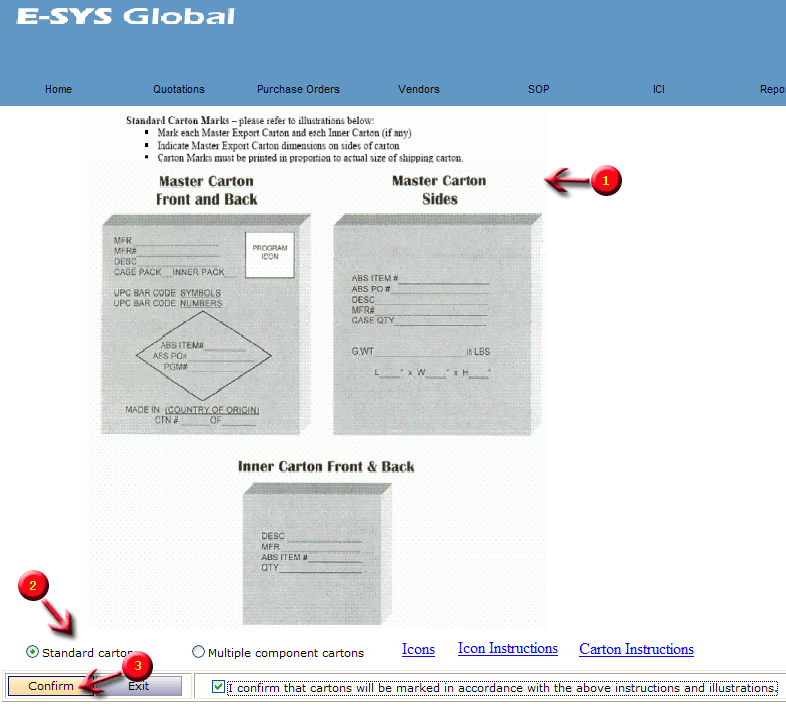
Instructions
|
| 1 |
Review the carton marking instructions |
| 2 |
Click to view instructions for standard or multi component cartons. Icons, Icon
Instructions, and Carton Instructions direct from the SOP can be viewed through
the links.
|
| 3 |
Check the box to confirm that cartons will be marked as per the instructions.
Then the confirm button will activate and the page will navigate to the Next
Step: Confirm Payment Terms
|
Step 2 of 4:
Select Payment Terms
After confirming the carton marks, the system will navigate to the following
page (detailed instructions below image):
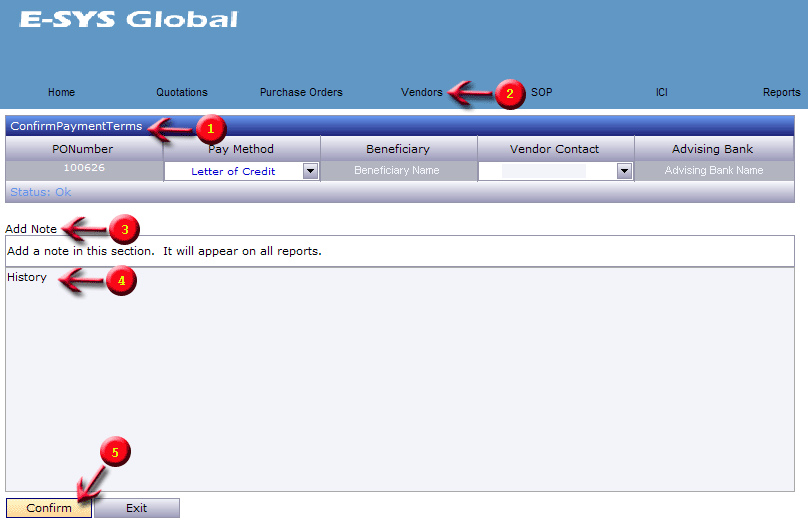
Instructions
|
| 1 |
Confirm Payment Terms:
Select Pay Method, Beneficiary, Vendor Contact, and Advising Bank by clicking
each field and selecting the appropriate information.
|
| 2 |
If any of the above terms are blank, then click the Vendor Maintenance menu item
under "Vendors" and update the information. You cannot proceed to the next step
until this information is complete.
|
| 3 |
If needed, you may add a note in the Add Note section. This note will appear on
all reports generated from the system and will be reviewed by ICI and
Albertsons.
|
| 4 |
All historical notes, negotiate change notes, etc. will appear in this field. |
| 5 |
After all fields are complete, click the Confirm button to proceed to the Next
Step: Confirm Order |
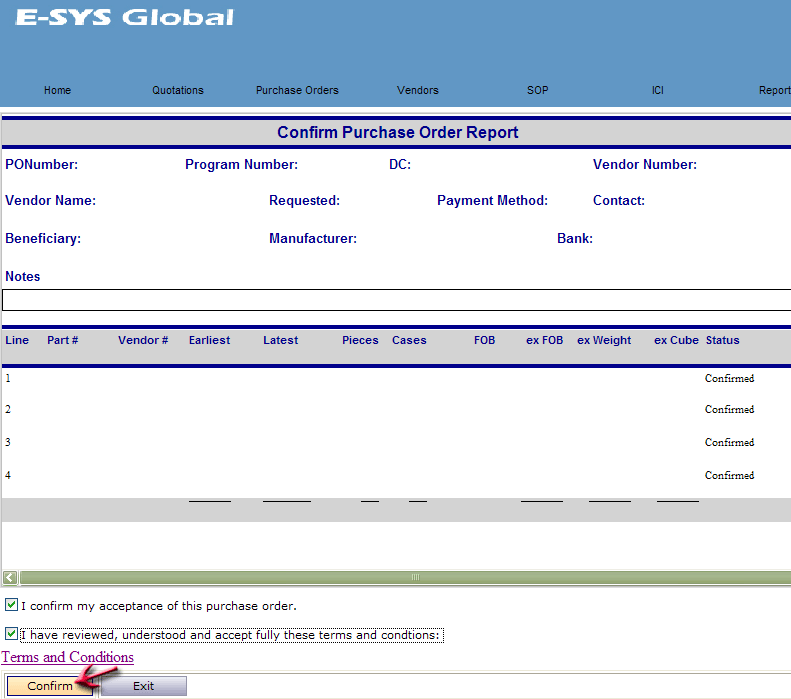
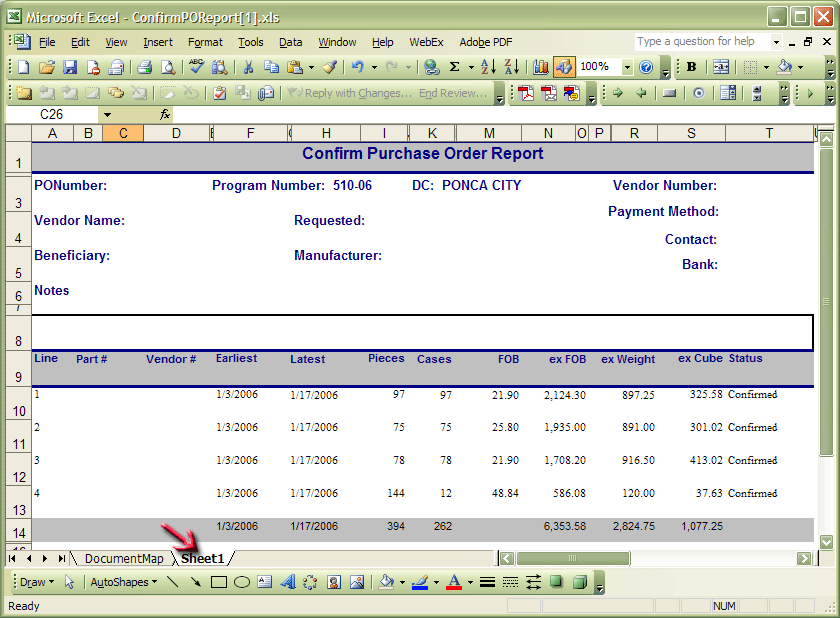
Step 3 of 4:
Confirm Order
After selecting the payment terms, the next step is reviewing the terms and
conditions of the PO and agreeing to the conditions. As shown in the image
below, all the PO details will be displayed in a report. After reviewing all
the information, you are certain all data is correct, and you have reviewed all
the terms and conditions in the SOP, click the confirmation check boxes. The
"confirm" button will activate and you will be navigated to the final step.
Step 4 of 4:
Order is confirmed! Print details in a report
Congratulations! You have successfully confirmed a purchase order. The report
displayed on the last page is exactly as the one above, with the added option
of printing or exporting the report (detailed instructions below image).
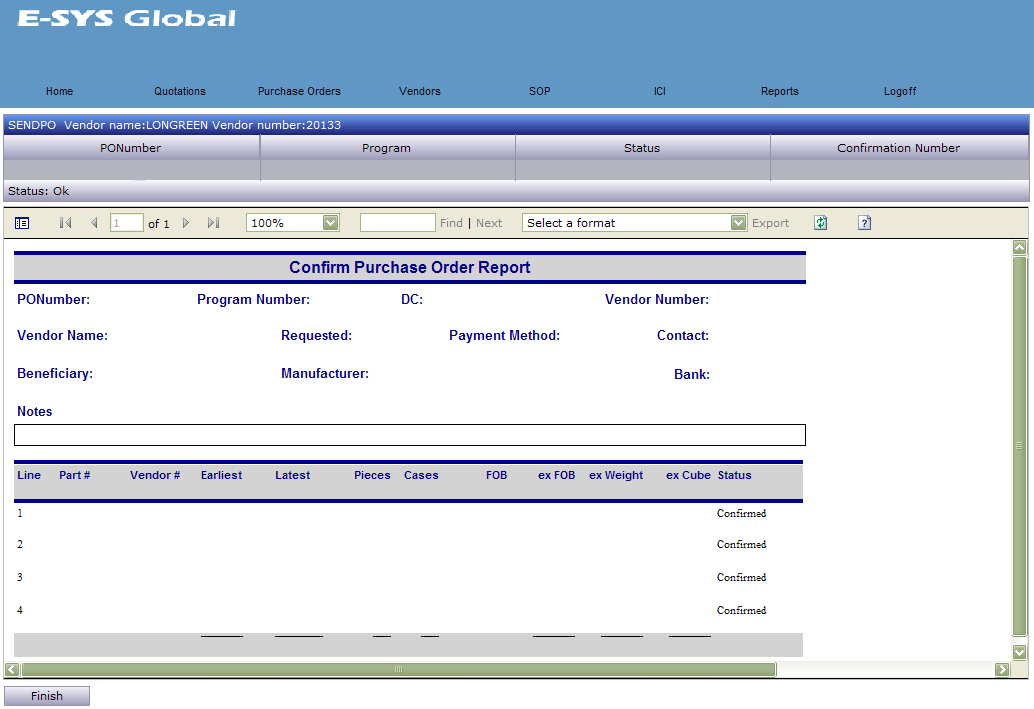
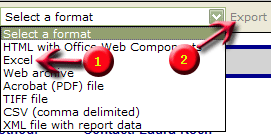
| 1 |
Click the drop down arrow on "Select a format" and pick the format the report
should export with.
In this example, we have selected the "Excel" format. This will export the
report into an Excel Workbook. |
| 2 |
Click "Export"
The report will be on the "Sheet1" tab of the Excel workbook, not the "Document
Map" sheet (below). |
Hint: If you export the data in a CSV file and save to your computer (don't
select "open"), then you can open the file and the data will all display in
tabular format. Then save it in an Excel format. This is an easy way to work
with the data if you need to build your own spreadsheets.
Once you click Finish, the site will navigate back to the list
of POs left to confirm.
 ®
®